On this page…
Hey! Read these instructions carefullly and follow them closely. This process can be a bit tricky. Again, read & follow these instructions with diligence!
Create the AWS (Amazon Web Services) Account
Make sure you have an Amazon account. If you've ever bought anything from Amazon, you do. Find your user name (your email address) & your password. If you don't, don't worry—you'll create one in just a moment.
Go to http://aws.amazon.com.
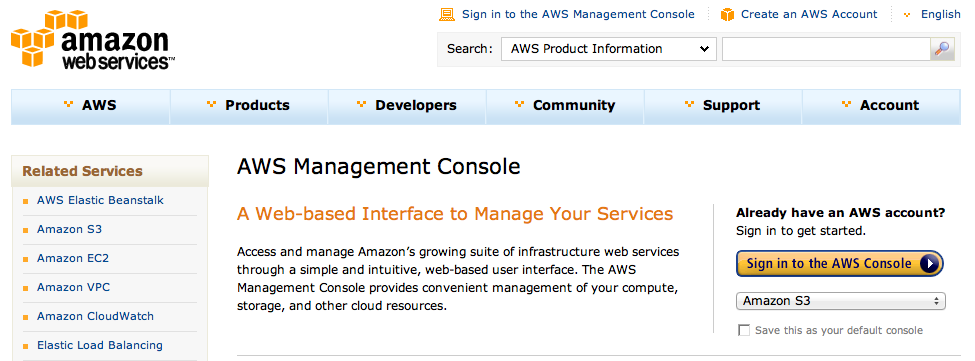
Click on the link in the upper right titled "Create an AWS Account" (see Figure 1).
- If you're an existing Amazon user, just enter your existing Amazon account user name & password & check the box next to I Am A Returning User. You'll next need to enter other info, including a credit card. Do so until you've finished creating your AWS account.
- If you don't already have an Amazon account, enter your email address & check the box next to I Am A New User. On the following pages you'll have to tell Amazon some information, including a password (write it down!) & your credit card info (you won't be charged for anything unless you use it, & even then the rates are outrageously low). Keep going until you've created an AWS account.
Sign in to the AWS Console
After you've created an AWS Account, go to http://aws.amazon.com/console.
Click on the button labeled Sign In To the AWS Console.

The AWS Management Console will open.
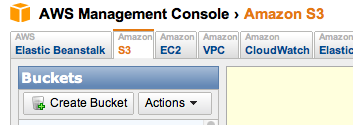
Click on the S3 button so that it's chosen.
Create an S3 bucket
At this point you have no buckets (S3's word for top-level folders). Let's create one.
Click on the Create Bucket button.
The Create A Bucket window will appear.
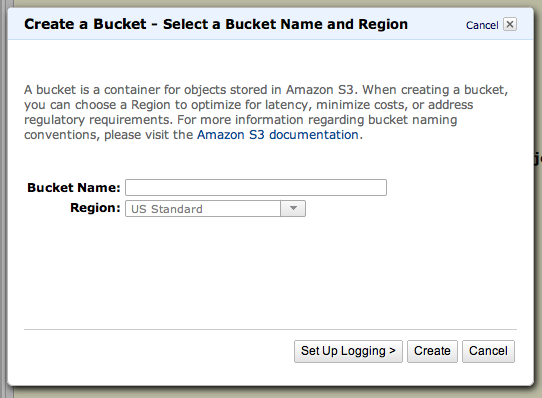
For Bucket Name, enter something unique (I chose colostomo.com, which you cannot use).
NOTE: Bucket names have to be unique across all of S3, so "images" or "website" was taken long ago. I use bucket names like "grannedocs" & "grannefiles" because those are unique. Folders within buckets don't have to worry about unique names, so you could have an "images" folder inside all your buckets without an issue.
For Region, select US Standard.
NOTE: If you wanted to enable logging to that you can track visits to the website you were going to make, you would click on Set Up Logging and enter the appropriate information there, but we're not going to do that.
Press Create. The Create A Bucket window will close.
AWS will create your bucket and will select it in the AWS Console, informing you that the bucket is empty.

Turn your bucket into a static website
Click on the Properties button. The Properties panel will open on the bottom of the browser window.
Permissions
Click on the Permissions tab.

Click on Add More Permissions.
Click on Add Bucket Policy. The Bucket Policy Editor window will open.
Paste the following in, changing example-bucket to your bucket name (colostomo.com in my case):
{
  "Version":"2008-10-17",
  "Statement":[{
    "Sid":"PublicReadForGetBucketObjects",
        "Effect":"Allow",
      "Principal": {
            "AWS": "*"
         },
      "Action":["s3:GetObject"],
      "Resource":["arn:aws:s3:::example-bucket/*"
      ]
    }
  ]
}
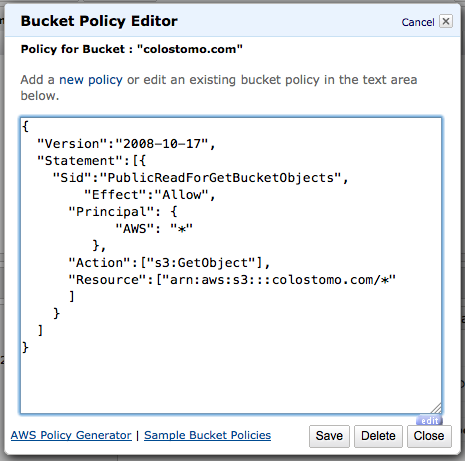
Press Save. The Bucket Policy Editor window will close.
Website
Click on the Website tab.

Check the box next to Enabled.
For Index Document, enter index.htm or index.html, whichever one you're using.
For Error Document, you don't need to enter anything.
TIP: Notice the link next to Endpoint—that is the URL that will point to your website! Copy it somewhere. Yes, it is ugly (in my case, it was http://colostomo.com.s3-website-us-east-1.amazonaws.com/). I will tell you later how to change that so it's pretty.
Press Save.
Work with content in your bucket/website
You will need to do three things to get content into your bucket/website:
- Upload files.
- Create folders.
- Move files & folders around into & out of folders.
Upload files
To upload files, press the Upload button. The Upload Select Files window opens.
Press Add Files.
Select the file you want to add to your bucket & press Open (or OK—it depends upon your browser & operating system).
If you have more files you wish to upload, press Add Files again, choose the file, & press Open.
Repeat until you have selected all the files you want to upload.
Press Start Upload. The Upload Select Files window will close.
A moment later, you will see the files you chose in your bucket.
Create folders
To create a folder, press Create Folder.
Name the folder.
Move files & folders around into & out of folders
You will want to move files & folders around. For instance, you may upload a file directly into your bucket and then realize that you want it inside the images folder. Here's how to move things (files and folders) around.
Right-click on the item you want to move.
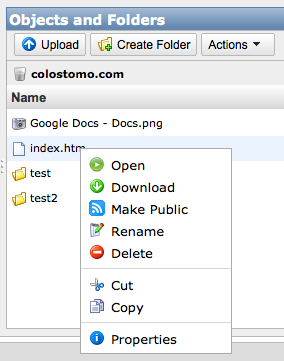
Select Cut from the menu that appears.
Double-click on the folder into which you wish to place the object you just cut. You should now be in the folder.
Right-click in the empty area inside the folder you're in.
Select Paste from the menu that appears.
You should now see the file or folder inside the folder.
An easier way to edit your files in your bucket
If you don't want to manage everything through a web browser (& I can understand if you don't), try software that makes working with S3 very similar to working with SFTP servers.
What you'll need
If you were connecting to an FTP or SFTP account, you'd need to know your user name & password. Amazon S3 calls those things your Access Key ID & your Secret Access Key. Here's how to find them.
Go to http://aws.amazon.com/console & sign in to the AWS Console.
In the upper right of the AWS Console, you'll see your name. Click on it & select Security Credentials from the dropdown menu. A new tab will open, at https://aws-portal.amazon.com/gp/aws/developer/account/index.html?action=access-key.
Scroll down to the Access Credentials section & make sure the Access Keys tab is chosen.
Your Access Key ID will be listed. It will look something like this: 0B57PLW0HM26LAR8QCR1
To see your Secret Access Key, click on Show. It will look something like this: k95giurgbj8ozLDPrSue0X6zzcD/uoRBbxlojl2+
When you try to connect to your S3 account using the software listed in the next sections, you'll need to enter in your Access Key ID & your Secret Access Key.
Mac OS X
Cyberduck is free, open source, and works beautifully with S3.
Transmit is prettier, faster, and also works wonderfully with S3.
S3Fox is a Firefox extension that isn't the prettiest, but it will do the job (more info at the S3Fox website).
Windows
Cloudberry S3 Explorer is free & gets good reviews.
S3 Browser is free & seems to be updated a lot.
S3Fox is a Firefox extension that isn't the prettiest, but it will do the job (more info at the S3Fox website).
